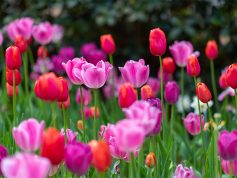
Muscari (lat. Muscari) is a graceful bulbous plant that delights the eye in spring with its bell-shaped inflorescences in shades of blue, purple, and less commonly white. Due to its dense, cluster-like flowers, muscari is often called “grape hyacinth” or “mouse hyacinth.” These plants are not only beautiful but also undemanding, making them ideal for both indoor cultivation in pots and planting in open ground.
🏡 Caring for Muscari Indoors Before Transplanting
If you bought a blooming muscari in a pot in early spring, you can keep it indoors until the frosts end. Here’s how to take care of it:
Lighting
Muscari loves light, but indoors it’s better to place it in a spot with diffused sunlight to avoid overheating near the window.
Watering
Water moderately, avoiding waterlogging. The soil should be slightly moist but not soggy. After flowering ends, reduce watering.
After Flowering
Remove the spent flower stems, but leave the leaves — they nourish the bulb. The leaves will naturally begin to wither later. Continue caring for the plant until the leaves turn yellow.
🌼 When and How to Transplant Muscari to Open Ground
If you bought a blooming plant, wait until it has fully bloomed and the leaves begin to yellow. This usually happens by mid-to-late spring.
It’s best to transplant the bulbs after the growing season ends — in May or June.
What to Do if Muscari Blooms Early and the Leaves Start Yellowing in April?
If the muscari has finished blooming earlier than usual, and the leaves started to yellow by the end of April, you can transplant them into the open ground right now, especially if:
- the bulbs are planted too shallowly and are drying out,
- the plant is placed in a hot room or on a sunny windowsill.
In this case, transplanting outdoors will be a better option than keeping the muscari in the pot in the heat.
What to Do with the Leaves During Transplanting:
🔹 Do not cut them completely!
🔹 Green and partially yellowing leaves are still feeding the bulb.
🔹 During transplantation, simply plant the bulb with the leaves carefully in the ground — they will dry out on their own over time.
🔹 Only cut completely dry, straw-colored leaves.
🌱 Step-by-Step Guide to Transplanting Muscari
1. Preparing the Site:
Choose a sunny or lightly shaded spot with loose, well-drained soil. Muscari does not like waterlogging.
2. Removing the Plant from the Pot:
Carefully remove the bulbs from the pot. You can gently shake off the soil, but do not damage the roots.
3. Planting:
Plant the bulbs at a depth of 6–8 cm, with 5–10 cm of space between them.
4. Watering After Transplanting:
Water moderately. Afterward, watering is only needed in case of drought, as muscari does not like overwatering.
How Muscari Bulbs Behave in the Ground
Muscari bulbs behave differently compared to, for example, tulips.
🔹 Tulips can “go” deeper into the soil over time, especially if it’s loose. This happens due to root growth, which “pulls” the bulb down. In such cases, planting baskets are often used to control the depth.
🔹 Muscari, on the contrary, tends to gradually “crawl” closer to the surface. If you notice that the bulbs are too close to the surface, simply cover them with soil. Planting baskets are usually not necessary for them.
🌿 Caring for Muscari After Transplanting
Watering:
Only during extended droughts. Muscari is resistant to temporary dryness.
Pruning:
After the leaves have completely wilted (usually in June), you can carefully remove the above-ground parts.
Wintering:
In most regions of Ukraine, muscari winters well in the ground without additional cover. Only in case of very harsh winters can the area be lightly covered.
Do not dig up the bulbs every year — it’s better to leave them in the ground for 3–5 years.
Reproduction:
Over time, muscari form dense clusters. After a few years (usually 3–5), they can be carefully divided to rejuvenate the plantings and give each bulb more space to grow.
Muscari is one of those plants that delights the eye with its spring simplicity, requiring little effort from the gardener. The key is a little care and proper transplanting — and it will bloom abundantly in your garden next year.